Poor drainage can transform your beautiful garden into a waterlogged mess, damage your home’s foundation, and create costly problems down the line. Installing an effective drainage system might seem overwhelming, but with proper planning and the right approach, most homeowners can tackle this project successfully.
This guide walks you through every step of drainage installation, from initial assessment to long-term maintenance. You’ll learn how to identify problem areas, choose the right materials, and install a system that protects your property for years to come.
Understanding Your Property’s Drainage Needs
Before breaking ground, spend time observing how water moves across your property during heavy rainfall. Walk around your home and garden, noting where puddles form and how long they persist. Pay particular attention to areas near your foundation, low-lying sections of your garden, and spots where water seems to collect rather than flow away naturally.
Your soil type plays a crucial role in drainage planning. Clay soils retain water longer and may require more extensive drainage solutions, whilst sandy soils typically drain more quickly but might need different pipe placement strategies. Consider your local climate patterns as well—areas with frequent heavy rainfall need more robust systems than regions with lighter, more sporadic precipitation.
Essential Tools and Materials
Gathering the right equipment before starting will save time and frustration during installation. You’ll need basic digging tools including spades and trenching shovels, a spirit level for checking gradients, measuring tape for accurate spacing, and a string line for marking your drainage path. A wheelbarrow proves invaluable for moving soil and materials efficiently.
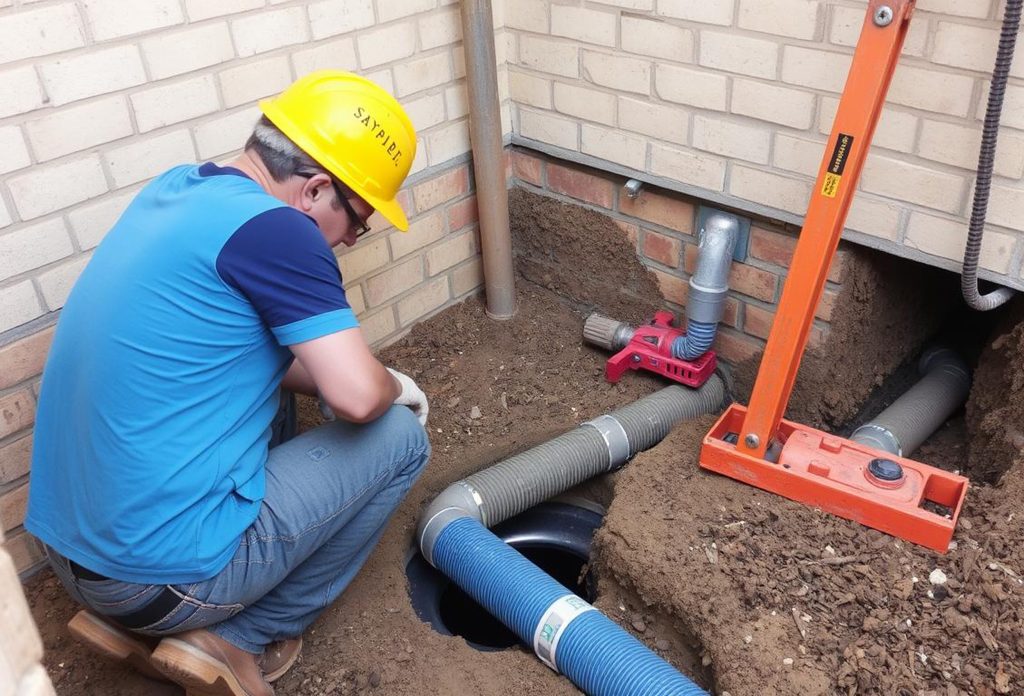
Material selection depends on your specific drainage needs and budget. Perforated drainage pipes form the backbone of your system, with 100mm diameter pipes suitable for most residential applications. Landscape fabric prevents soil from clogging your system whilst allowing water to pass through. Coarse gravel provides structural support and improves water flow around pipes. Don’t forget pipe connectors, end caps, and inspection chambers for maintenance access.
Step-by-Step Installation Guide
Start by marking your intended drainage route using spray paint or flags. Plan for a consistent gradient of at least 1:100 (1cm drop per metre) to maintain proper water flow. Your system should direct water away from buildings and towards a suitable outlet such as a soakaway, surface water drain, or natural watercourse.
Dig trenches approximately 300mm wide and deep enough to accommodate your pipe with adequate gravel coverage above and below. Maintain steady gradients by regularly checking with your spirit level—inconsistent slopes create low spots where debris accumulates and blocks flow.
Line each trench with landscape fabric, leaving enough material to wrap over the completed installation. This barrier prevents fine soil particles from infiltrating your drainage system whilst allowing water penetration. Add a 50mm layer of coarse gravel as your base, creating a stable foundation for the drainage pipes.
Install pipes with perforations facing downward to maximise water collection from the surrounding soil. Connect sections using appropriate couplers, checking each joint carefully to prevent future leaks. Surround pipes with additional gravel, maintaining at least 50mm coverage on all sides before wrapping with landscape fabric.
Backfill trenches gradually, compacting soil in layers to prevent settling. Replace topsoil and restore surface vegetation to match the surrounding areas. Proper backfilling prevents future subsidence whilst maintaining the integrity of your drainage system.
Protecting Your Investment
A well-installed drainage system provides decades of reliable service whilst protecting your property from water damage. The time invested in proper planning and installation pays dividends through reduced maintenance needs and improved property value.
Take pride in creating a system that handles whatever weather conditions come your way. With these techniques and regular upkeep, your drainage installation will continue performing effectively season after season, keeping your property dry and your foundation secure.